What is Leaky Roof?
A leaky roof is most likely the source of water stains that stretch across ceilings or run down walls. The difficult aspect is locating the leak; the roof leak repair is usually simple. Even if the leak isn’t bothering you or you’re getting a new roof, you should address it right away if you have a leaky roof. Small leaks can cause major issues like as mold, rotten frame and sheathing, lost insulation, and damaged ceilings in a short period of time. The ceiling stains were visible for over two years, indicating a flashing leak that resulted in a costly repair expense. The damage and subsequent repairs would have been minimal if the homeowner had dealt with it immediately.
Reason of Roof Leaking
The roof’s seams are frequently a weak spot. Large rolls of membrane are rolled out across a commercial roof’s wide length. Those membranes are fixed to the insulation or deck below, depending on whether the roof is entirely adhered or mechanically fastened. Multiple sheets must be overlapped and bonded, either using adhesive or hot-air welding, because no sheet is as wide as a roof. These seams hold up well in flat, open regions, but delamination at the margins of the roof particularly around flashing, pipes, or the site of an older patch might lead to a roof leak. The other common reason is because of neglect. Failure to check and maintain your roof can result in leaks at vulnerable points. Caulking and pitch pans can dry out, crack, and allow water to seep in. Leaks and further damage can be avoided by regular monitoring and resealing as necessary. Minor faults can become systemic problems, necessitating a full re-roof or, worse, structural work, if they are not addressed on a regular basis.
- Roof Leaking Inspection
- If you’re looking for a leak, start by looking upwards from the stains on the roof. Roof penetrations are normally the first hint to look for. The most prevalent source of leaks is items that breach the roof. In reality, even on older roofs, leaks in open sections of continuous shingles are uncommon. Plumbing and roof vents, chimneys, dormers, and anything else that protrudes through the roof are examples of penetrations.
- If you’re having trouble finding the leak, seek the help of a friend or a family member to climb up onto the roof with a garden hose. Begin by soaking the area immediately above the point where the leak first occurs in the house. When using the hose, isolate locations. Soak the downhill side of a chimney first, then the sides, and finally the tops of both sides. Allow the hose to run for a few minutes in one spot before moving it a little further up the roof.
- When a drip appears, instruct your assistant to shout to gain your attention. Be patient and don’t move the hose too quickly; this process can take well over an hour. Don’t be worried if rushing water doesn’t indicate the exact position of the leak. Begin by removing the shingles from the suspected region. There will be proof of the leak once they’ve been deleted, and you’ll be able to track it down to the source. Directly underneath and around a leaky roof, you’ll observe discoloured felt paper, water-stained or even rotten timber.
2. Possibilities of Leaks
- Plumbing Vent Boots and Roof Vents
If water is entering from the plumbing vent boots and roof vents to cause the leaking roof. Examine flexible rubber flashing for cracks in the base or metal vent pipe flashing for damaged seams. It’s possible that the rubber gasket that surrounds the vent pipe has decayed. Either of these scenarios could result in water entering the home. If necessary, replace the plumbing vent boot and fasten the base to the roof using washer-head roofing screws. If the boot is in good shape but the fasteners are missing, use washer-head roofing screws to replace them.

- Old Mounting Holes
Small nail holes from old vents, satellite dish brackets, or anything else formerly affixed to the roof can allow water to enter and cause damage for years before it is found. Slip a piece of roof flashing below the shingle to cover the nail or screw holes. To keep the flashing in place, apply a bead of caulk or roof cement to the top and bottom edges.

- Dormers and Walls
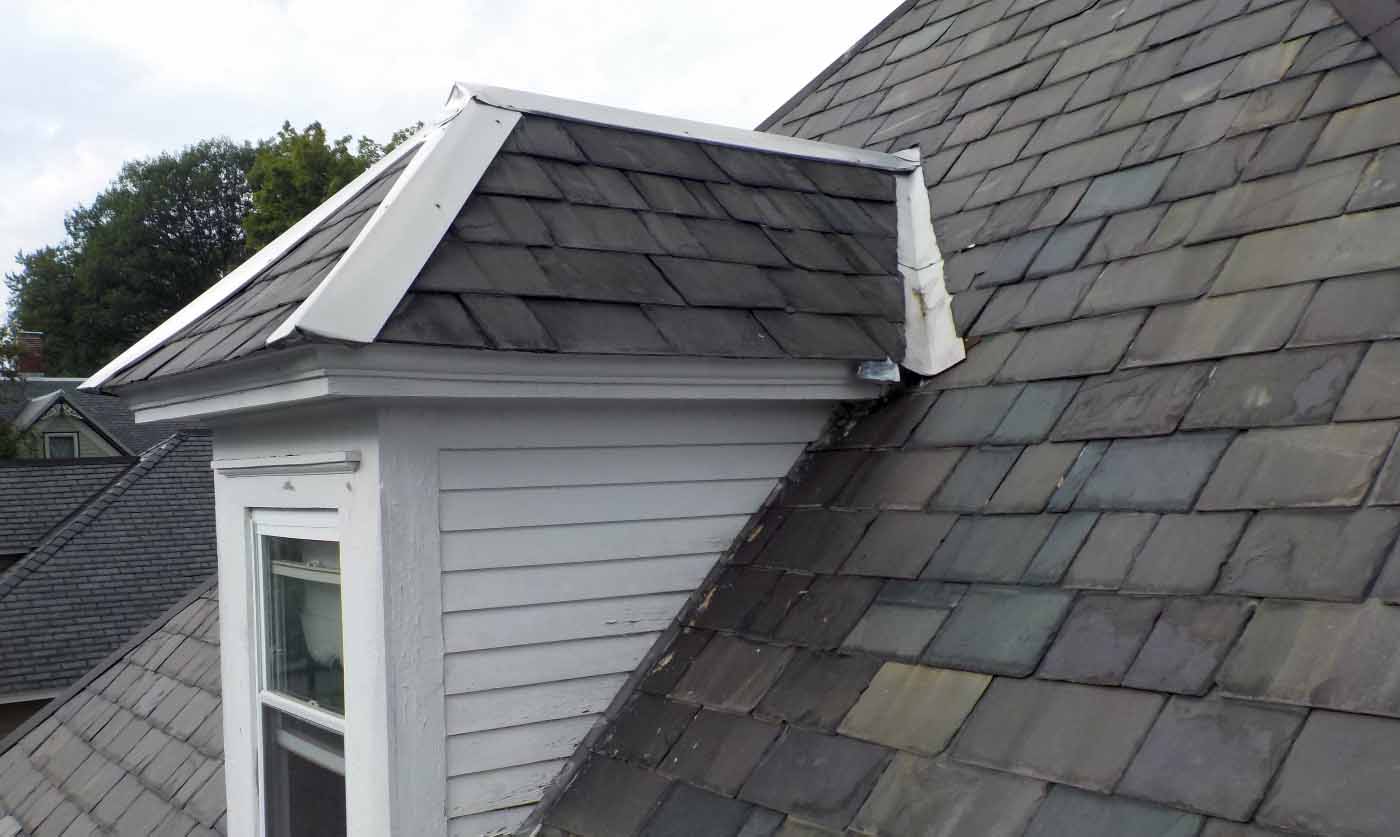
Water does not usually enter a house through the roof’s surface. Dormers have a lot of vertical entry points for water, such as cracks between the siding and the corner boards or windows. There are a few ways to solve this, first you can replace any broken or dried caulk that isn’t sealing adjoining surfaces adequately using silicone caulk. After that, replace any missing or rotten siding above the step flashing on dormers. Lastly, If any portions of the corner flashing have hardened caulk, re-caulk it.


